TECHNOLOGIES
INDUSTRIES
Need assistance? Talk to the expert

MageCloud Customers
Discover how ecommerce businesses worldwide use MageCloud to power their success.
So, you developed Magento 2 extension. When submitting a new Magento 2 extension to Magento Marketplace for the first time, the submission process doesn’t seem clear enough. Therefore, we have decided to write this post to share our experience of submitting new products to Magento Marketplace with you.
So let’s get started.
A Magento 2 module is a logical group – that is, a directory containing blocks, controllers, helpers, models – that are related to a specific business feature. In keeping with Magento’s commitment to optimal modularity, a module encapsulates one feature and has minimal dependencies on other modules.
Modules and Themes are the units of customization in Magento. Modules provide business features, with supporting logic, while themes strongly influence user experience and storefront appearance. Both components have a life cycle that allows them to be installed, deleted, and disabled. From the perspective of both merchants and extension developers, modules are the central unit of the Magento organization.
Modules can be installed with Composer allowing their version management. All modules installed in such a way are placed in the vendor/ folder and have the next base structure vendor/<vendor>/<type>-<module-name>. In this case <type> can be:
In a case when you have a very specific functionality or customization which is related to a specific project and there is no need to share it with other projects it should be created in the app/code/<vendor>/<type>-<module-name> directory and the required directories within it.
Let’s focus on how to prepare your module for submission to the Magento Marketplace.
Magento 2 Extension created. You, as a developer, want to get started on Magento Marketplace and list your extension, but you’re a little confused about where to start? This article can help you with this and you’ll be selling your extensions on Magento Marketplace in no time.
Before you begin the Magento 2 extension submission process, you need to have the following items ready:
A few technical important things that you, as a developer, must always to keep in mind, especially if you want to submit your extension to the Marketplace:
Assume that you already have followed such standards and your extension is ready for submission. Create a package of your extension by performing a zip operation on the directory with your extension (excluding unnecessary directories).
For example: zip -r vendor-name_module-name-1.0.0.zip package-path/ -x ‘package-path/.git/*’
Use alphanumeric characters for the package filename with dashes to separate words. Do not use whitespaces.
Magento can retrieve your extension package from any valid GitHub URL (third party repositories are supported). Use alphanumeric characters for the package filename with dashes to separate words. Do not use whitespace.
Navigate to your component directory, with the composer.json file in the root, and make it a new Git repository. See the GitHub documentation for details. When you have committed and pushed your component to your GitHub repository, you can either use a Composer to refer to it directly or use the following steps to refer to the package through Packagist.
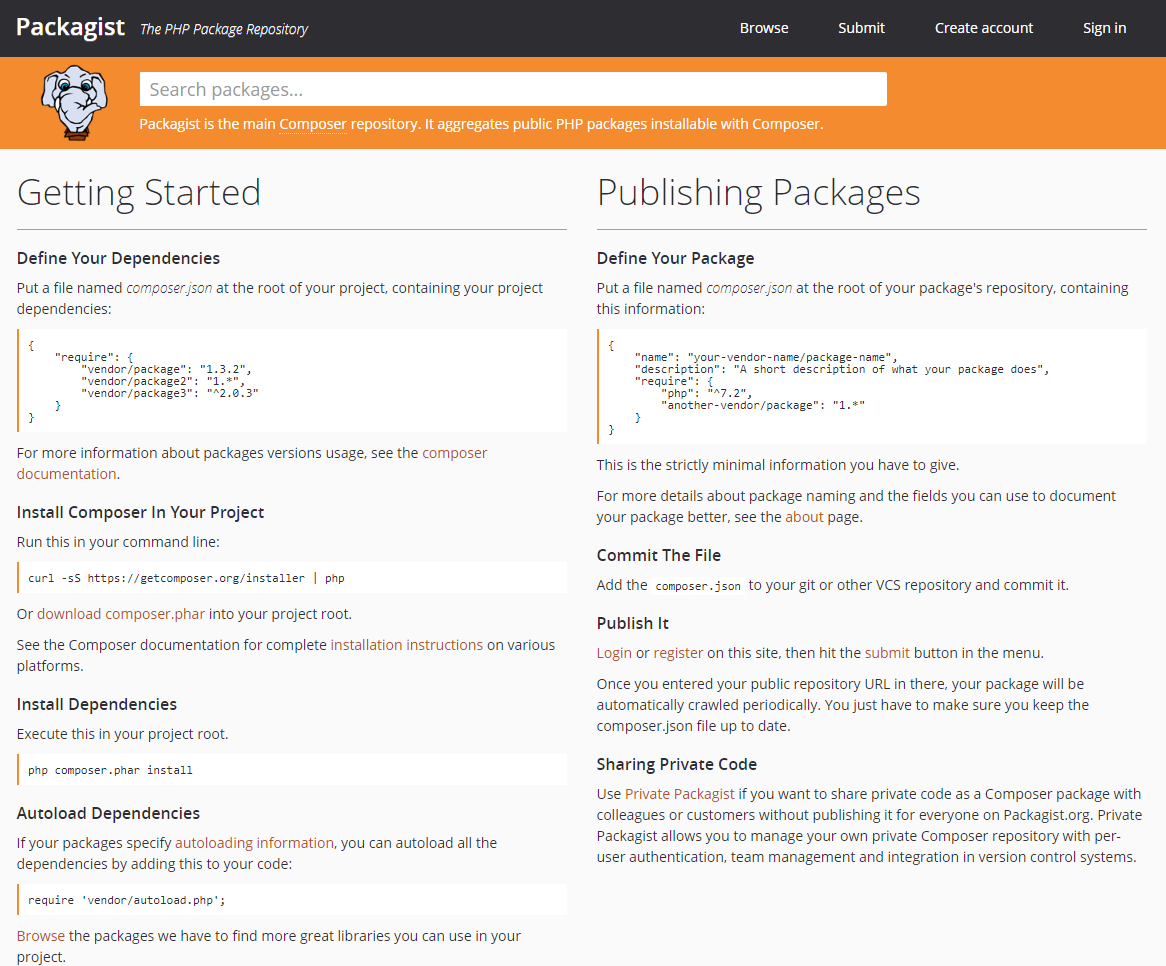
Register an account at Packagist:
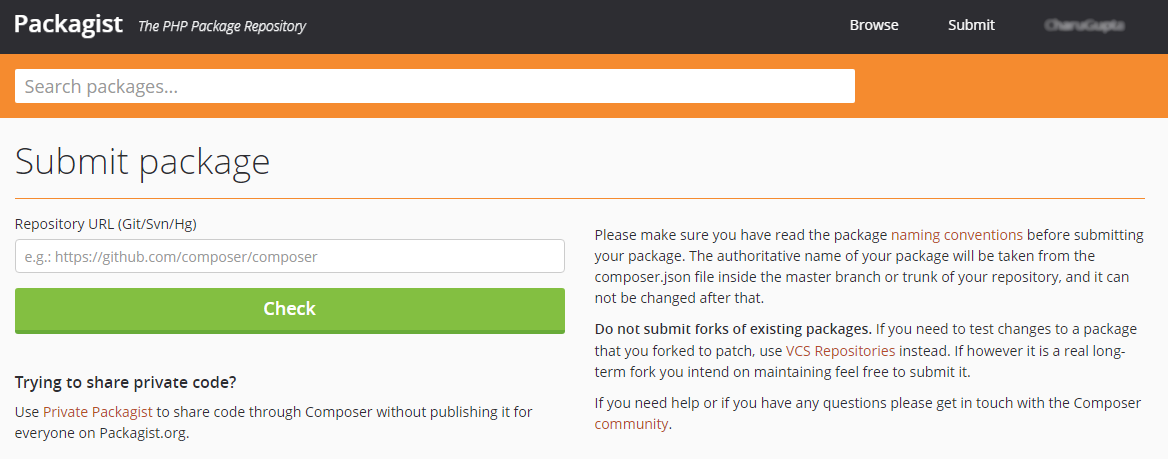
Click the Submit Package button and paste your GitHub repository link. Packagist automatically gathers the information from the component’s composer.json file and link it to the GitHub repository, allowing you to reference the package as vendor/module without any additional repository information because this is required solely using GitHub.
Please, use the reference to the configured composer auto-update – GitHub Webhooks.
If you use the Setup Wizard, you must use the Magento Marketplace repository. A private repository can be used for development or private code but installation must be done with a command-line interface (you can install a package that specifies a private repository only with command-line installation).
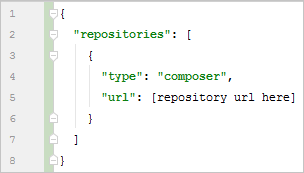
All packages on the private repository can now be referenced within the require field. Refer to the official documentation for more details on how to configure your project to use Private Packagist.
After completing development, testing, and creating a new extension entry, you can submit your extension for Technical and Marketing review. Keep in mind that if you have Shared Packages – they must pass technical review before they can be referenced by your extension. The extension enters a queue when submitted. Magento will review your extension code and submitted information according to the queue, sending feedback and confirmation by email. Track the status and progress of your extension submission through your Marketplace account. The Magento Extension Quality Program (EQP) verifies that all Marketplace extensions meet Magento quality standards and best practices.
The extension submission process requires you to do the following:
You can submit your extension for Marketing Review as soon as your marketing content is ready for review.
You must complete both the technical and marketing review to fully list your extension on the Magento Marketplace.
Create an account in Magento Developer Portal and fill Profile Information:

Once the account has been successfully created, you will be able to add you prepared extension:
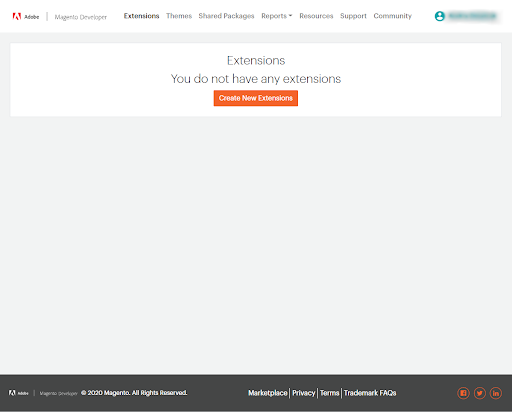
The Magento also provides you with clear information about how the submission process will be executed:
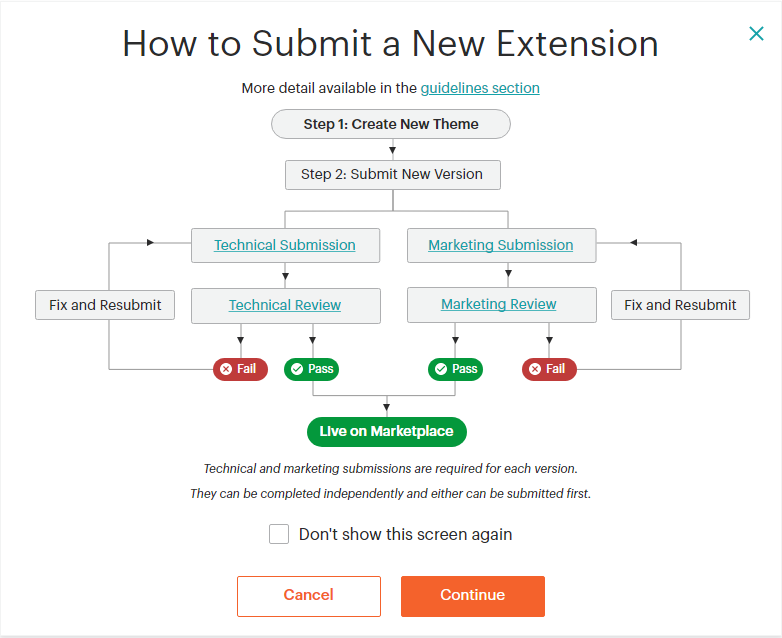
The following steps must be taken to add your module:
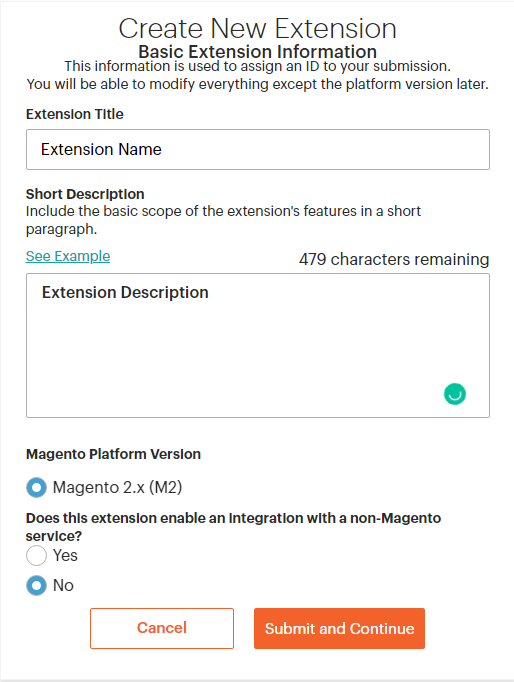
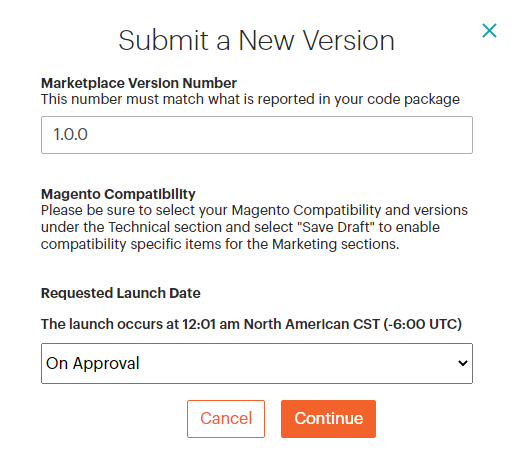
The extension submission process requires you to do the following:
Does this extension enable integration with a non-Magento service? – If your extension uses any third-party integration or service, you need to specify this.
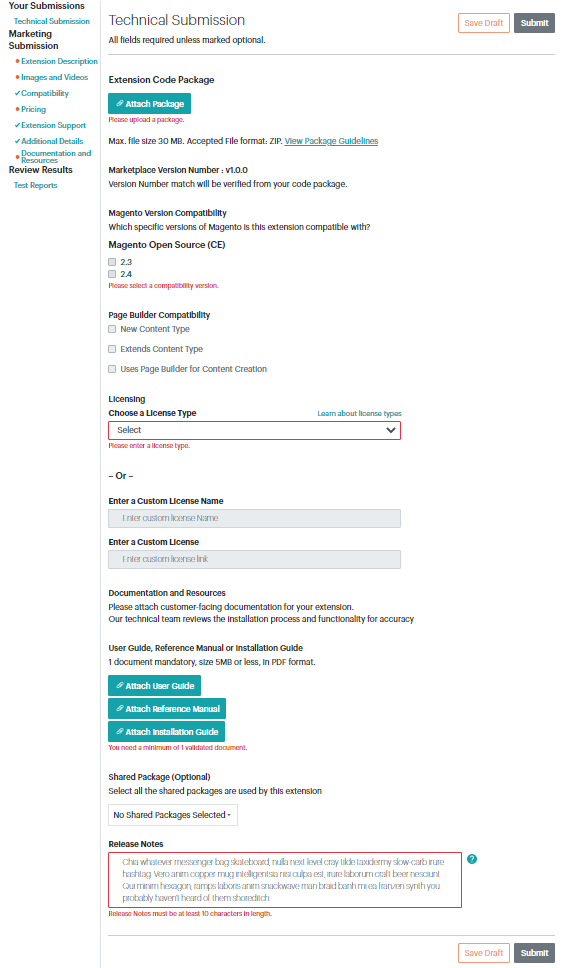
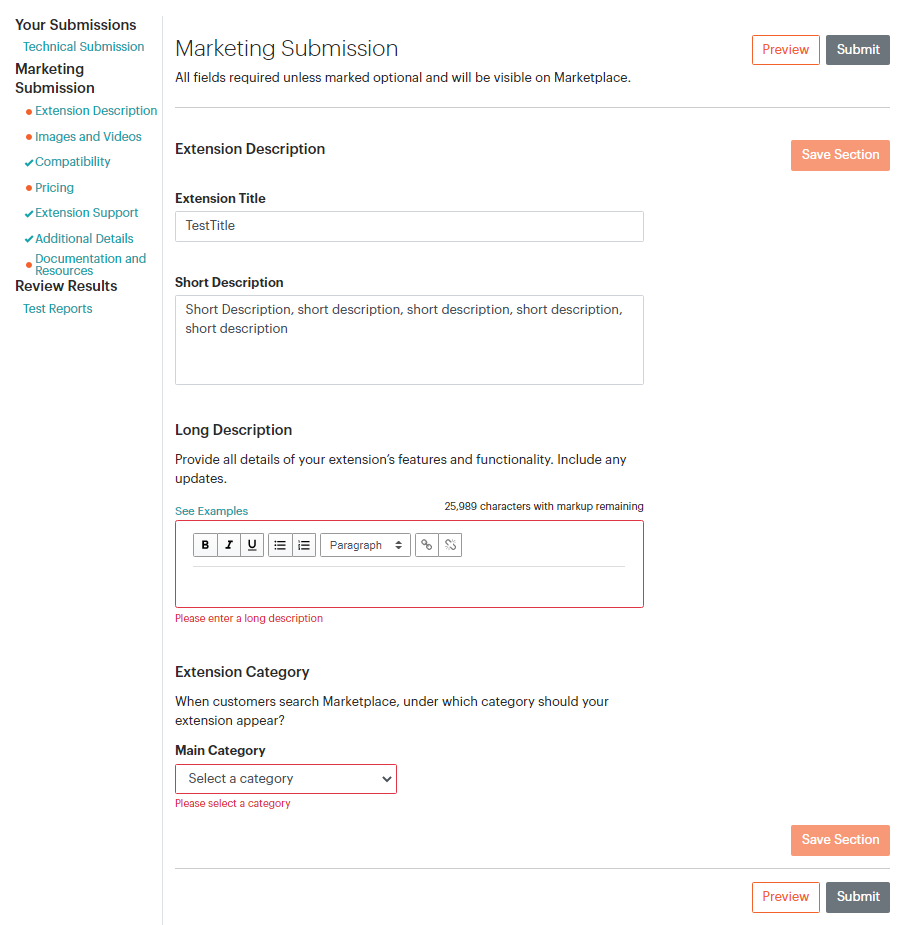
a. Extension Description:
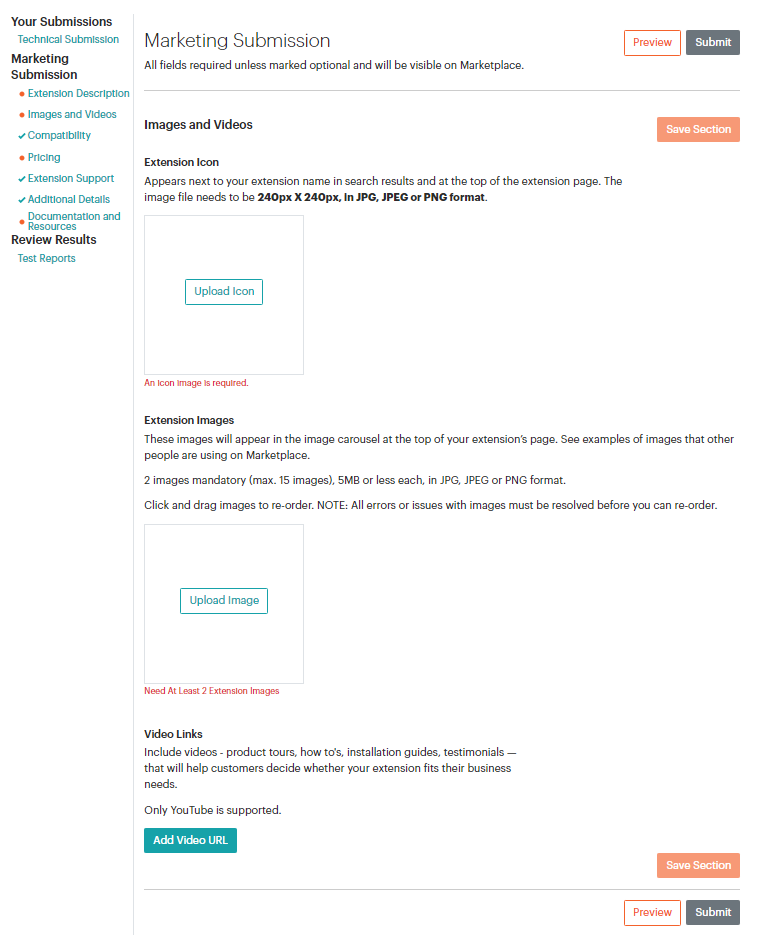
b. Images & Videos:
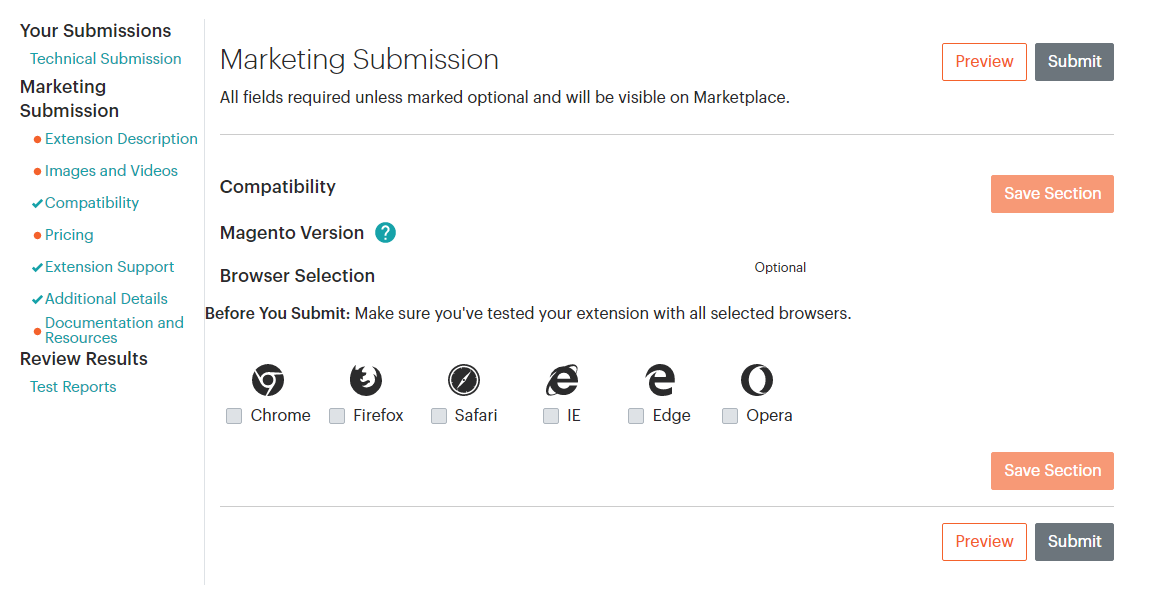
c. Compatibility:
d. Pricing:
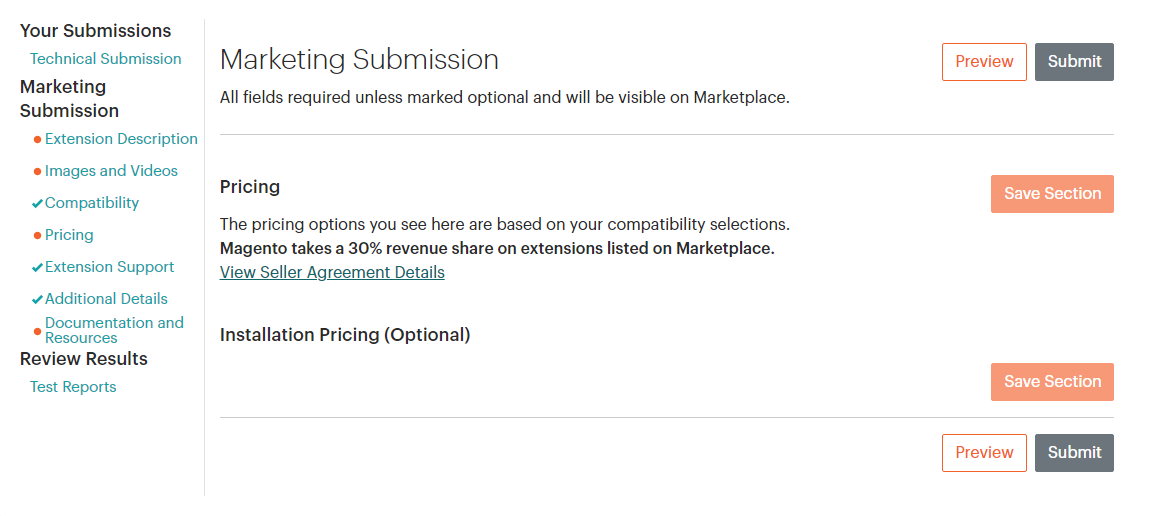
e. Additional Details:

When Magento 2 module development finished and you uploaded your code, it will go through automated install tests. Once those are passed, it will move to manual QA. This is where your developer will likely be involved and assisting with any errors if Magento QA team may find. When the review is complete, a link to the resulting report is provided for the extension that was submitted for review. Test results will also be communicated via email.
Once you have passed all these steps and your extension gets approved, it will get live and you will find it on the Marketplace.
The approval process can take from 24 hours up to seven days. If your extension is approved, you get a success email.
That’s all. Now, your task is just waiting for your sales number to grow.
If your extension is failed in any of this review, Magento will send you an email as well, with a list of errors that you have to resolve and improvements you must make.
Thanks for reading and Good luck!
*****
If you need a hand maintaining and optimizing your Magento website, please contact us to start discussing your requirements.
Please, take care of yourself! ?
Cities we operate in